American Flag Cake

Happy 4th of July!! I can’t believe it’s that time of year again! Can you? It seems like it was just here. For me July 4th brings friends and family together to celebrate and there’s no better way to do this then with an American flag dessert! I’ve been wanting to practice my cake skills and this was the perfect holiday. Honestly I will probably be using every holiday as an excuse to make a cake but hey that just me I love cake.

I thought I would share how I made this amazing cake. Not only does it look awesome its impresses all your guests when you cut into it. Ever since I found the perfect color gel for cakes I love making cakes with bright and exciting flavors and colors. I use Americolor and I found that it doesn’t take a lot of color gel to get the desire color which is awesome because I hate having to pour have the color gel into a batter to get bland color. No fun!
Here we go this cake is awesome, it does take some time but honestly I think I spent about 30 minutes total on it. Well once all the layers were baked. So assembling and decorating.
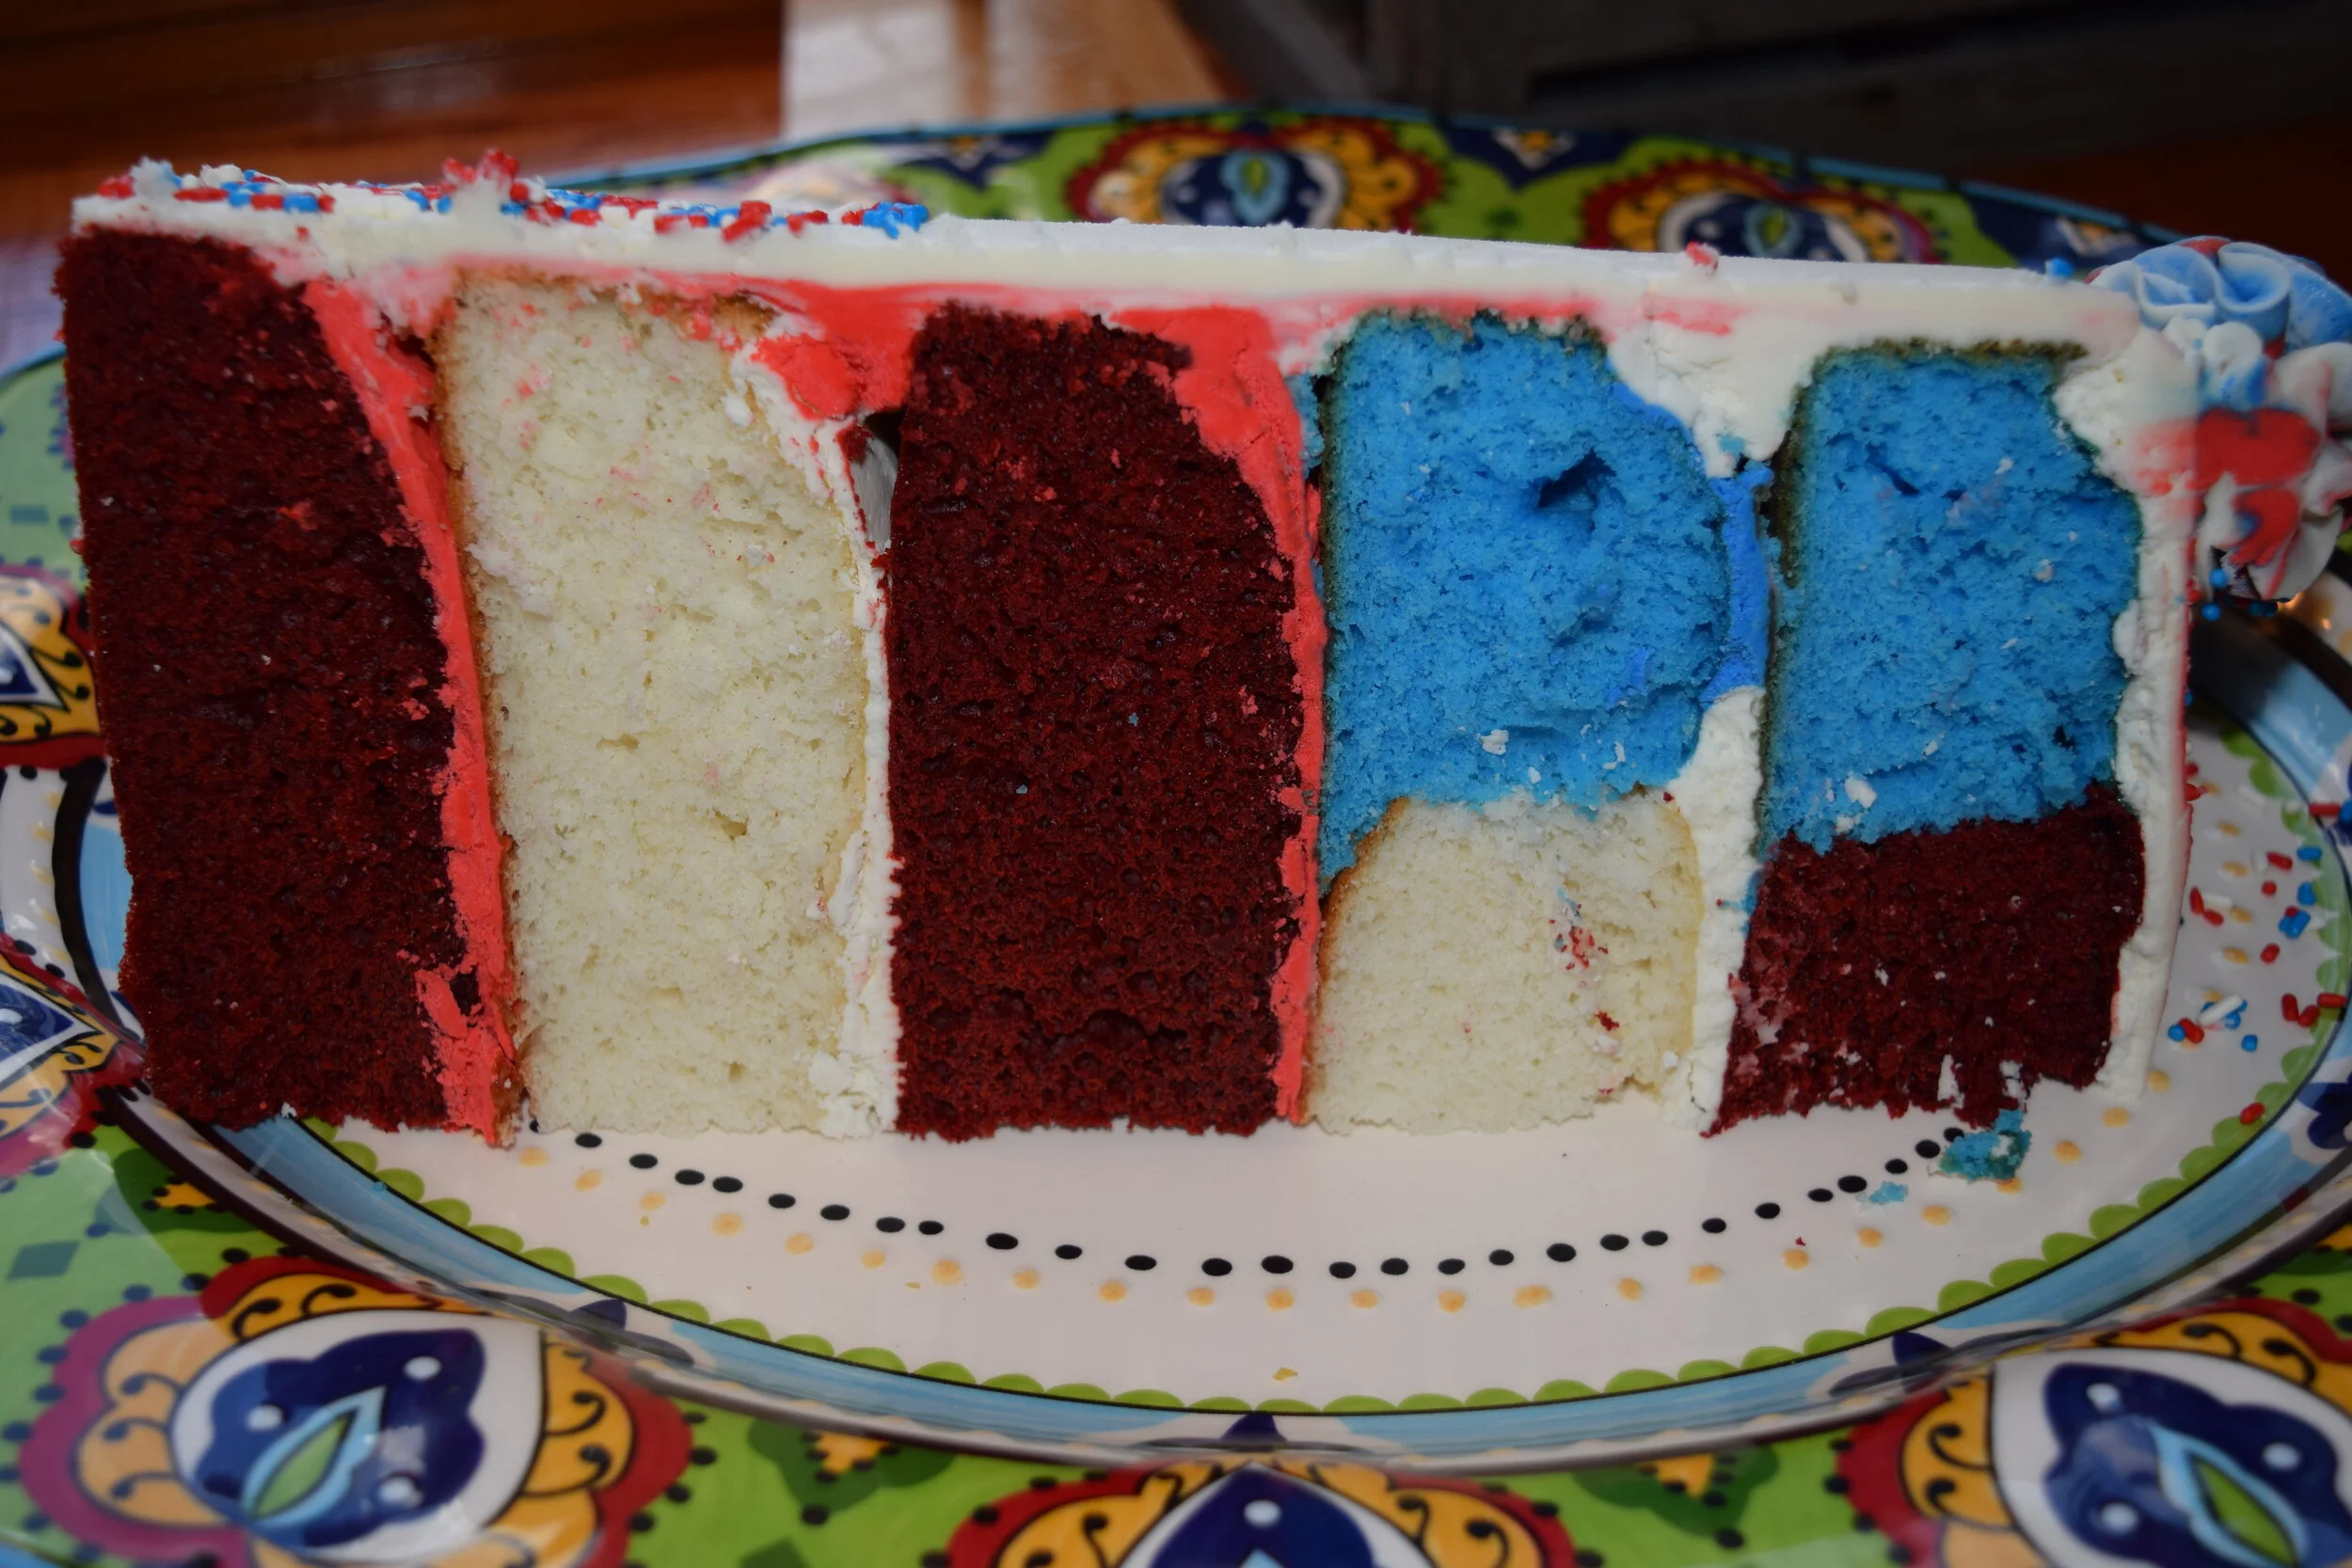
I started by baking all the cake layers the day before that way I could freeze them over night and they were easier to frosting. I think that’s the real secret that everyone should know. Use frozen cake!!!! Works every time! I used 2 8 inch layers of red velvet, and 1 4 inch layer of red velvet. 1 8 inch layer of white and 1 4 inch layer of white cake. Lastly I used 2 8 inch layers of white cake dyed blue.
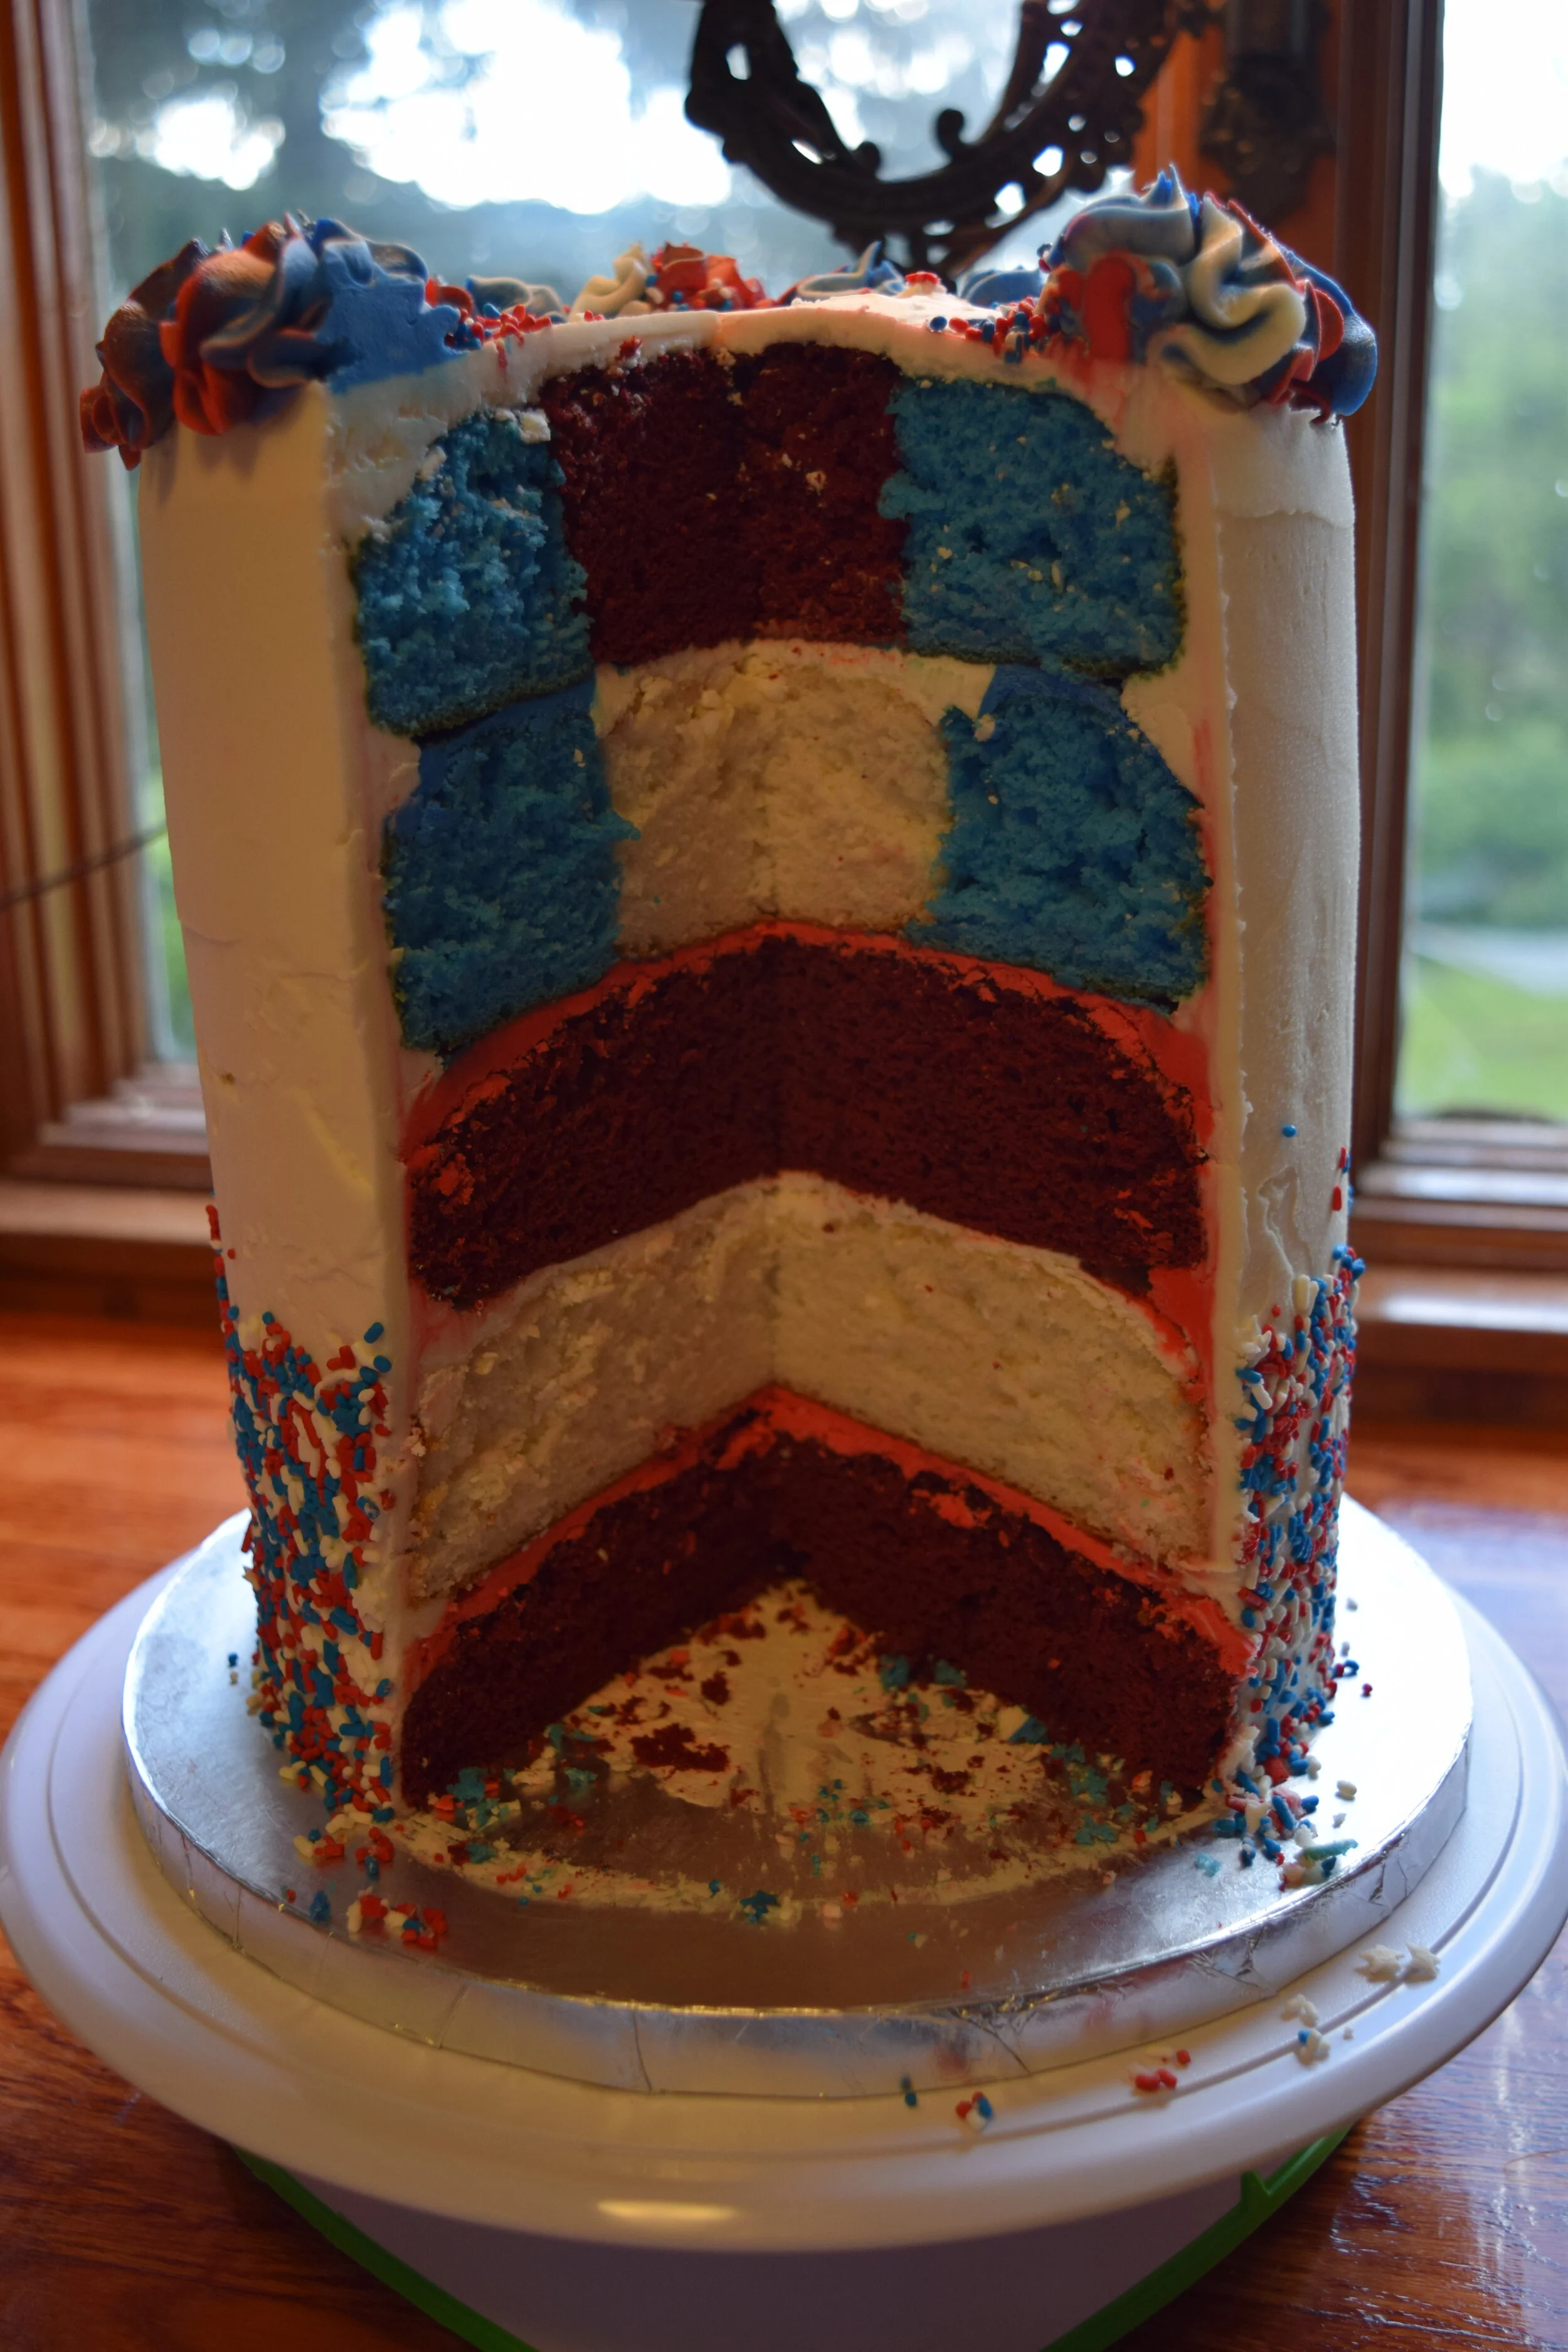
Once all the cake is baked and cooled. I cut out a 4 inch circle out of each of the blue layers and added one white inside one of the layers and the other layer I added the red 4 inch layer too. See pictures

Then FREEZE!!
The next day it was time to make this great cake. First I started by making two batches of American butter cream frosting. If you don’t have a good recipe you must try making mine its super easy and taste just like bakery frosting! One batch was strictly for the outside so I left it white and set it aside. The other batch I divided it into three bowls.

One blue, red, and white bowls of frosting. The blue I didn’t use as much maybe a cup and a half, about 2 cups of red frosting, and the rest was left white. I placed the divided frosting into decorating bags. It made combining all three colors at the end into one decorating bag so much easier. Because this was the batch of frosting I used for the inside of the cake and top of the cake to add the color flares too.

I started with a red velvet 8 inch layer then used a generous amount of red frosting. Next was the 8 inch white layer followed by white frosting, red velvet, red frosting, then blue with white inside, followed by white frosting on the inside and blue frosting on the outside, and lastly the blue layer with red inside was added on top.
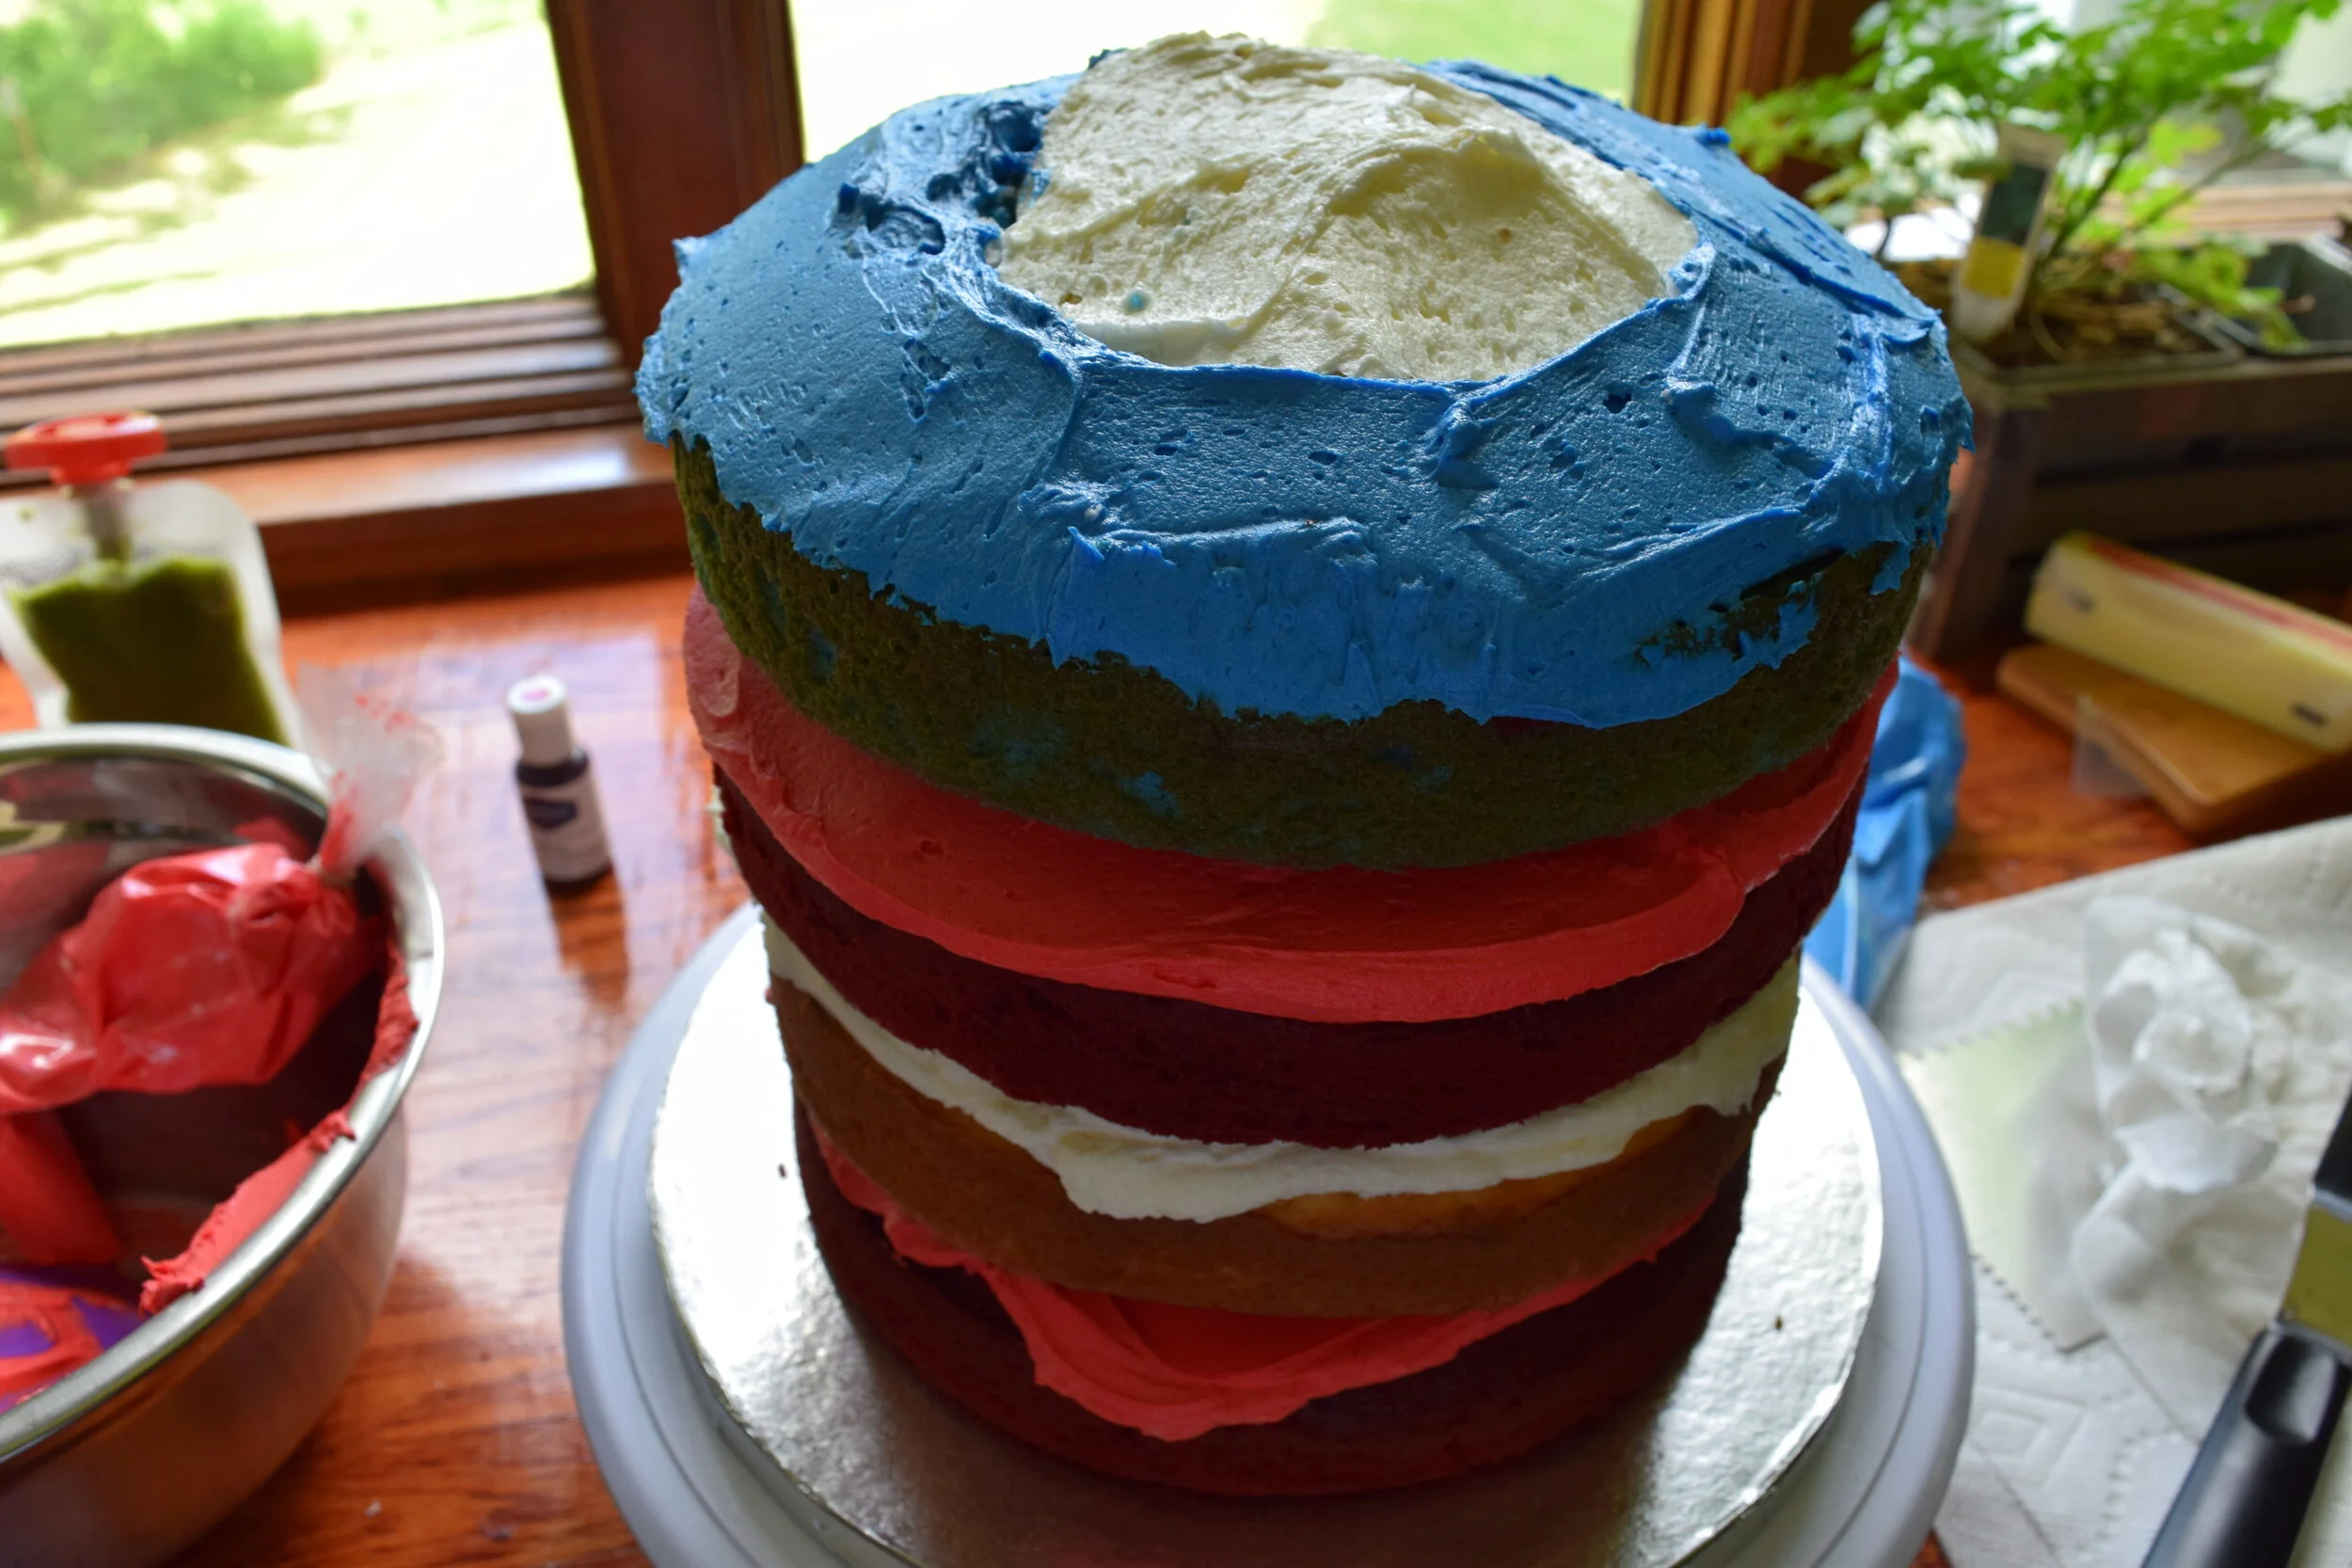
I used two dools to support the cake from tipping. With the extra red and blue and a little white frosting I combined them into one decorating bag for later use. Making sure not to mix them too much, in order to get the distinct colors. Once assembled I did a crumb coat with the remaining frosting that was left over. I tried as hard as I could to get the frosting nice and smooth. Once I was satisfied I put the whole cake into the fridge for 10 minutes so the crumb coat would set and make finishing the cake easier.
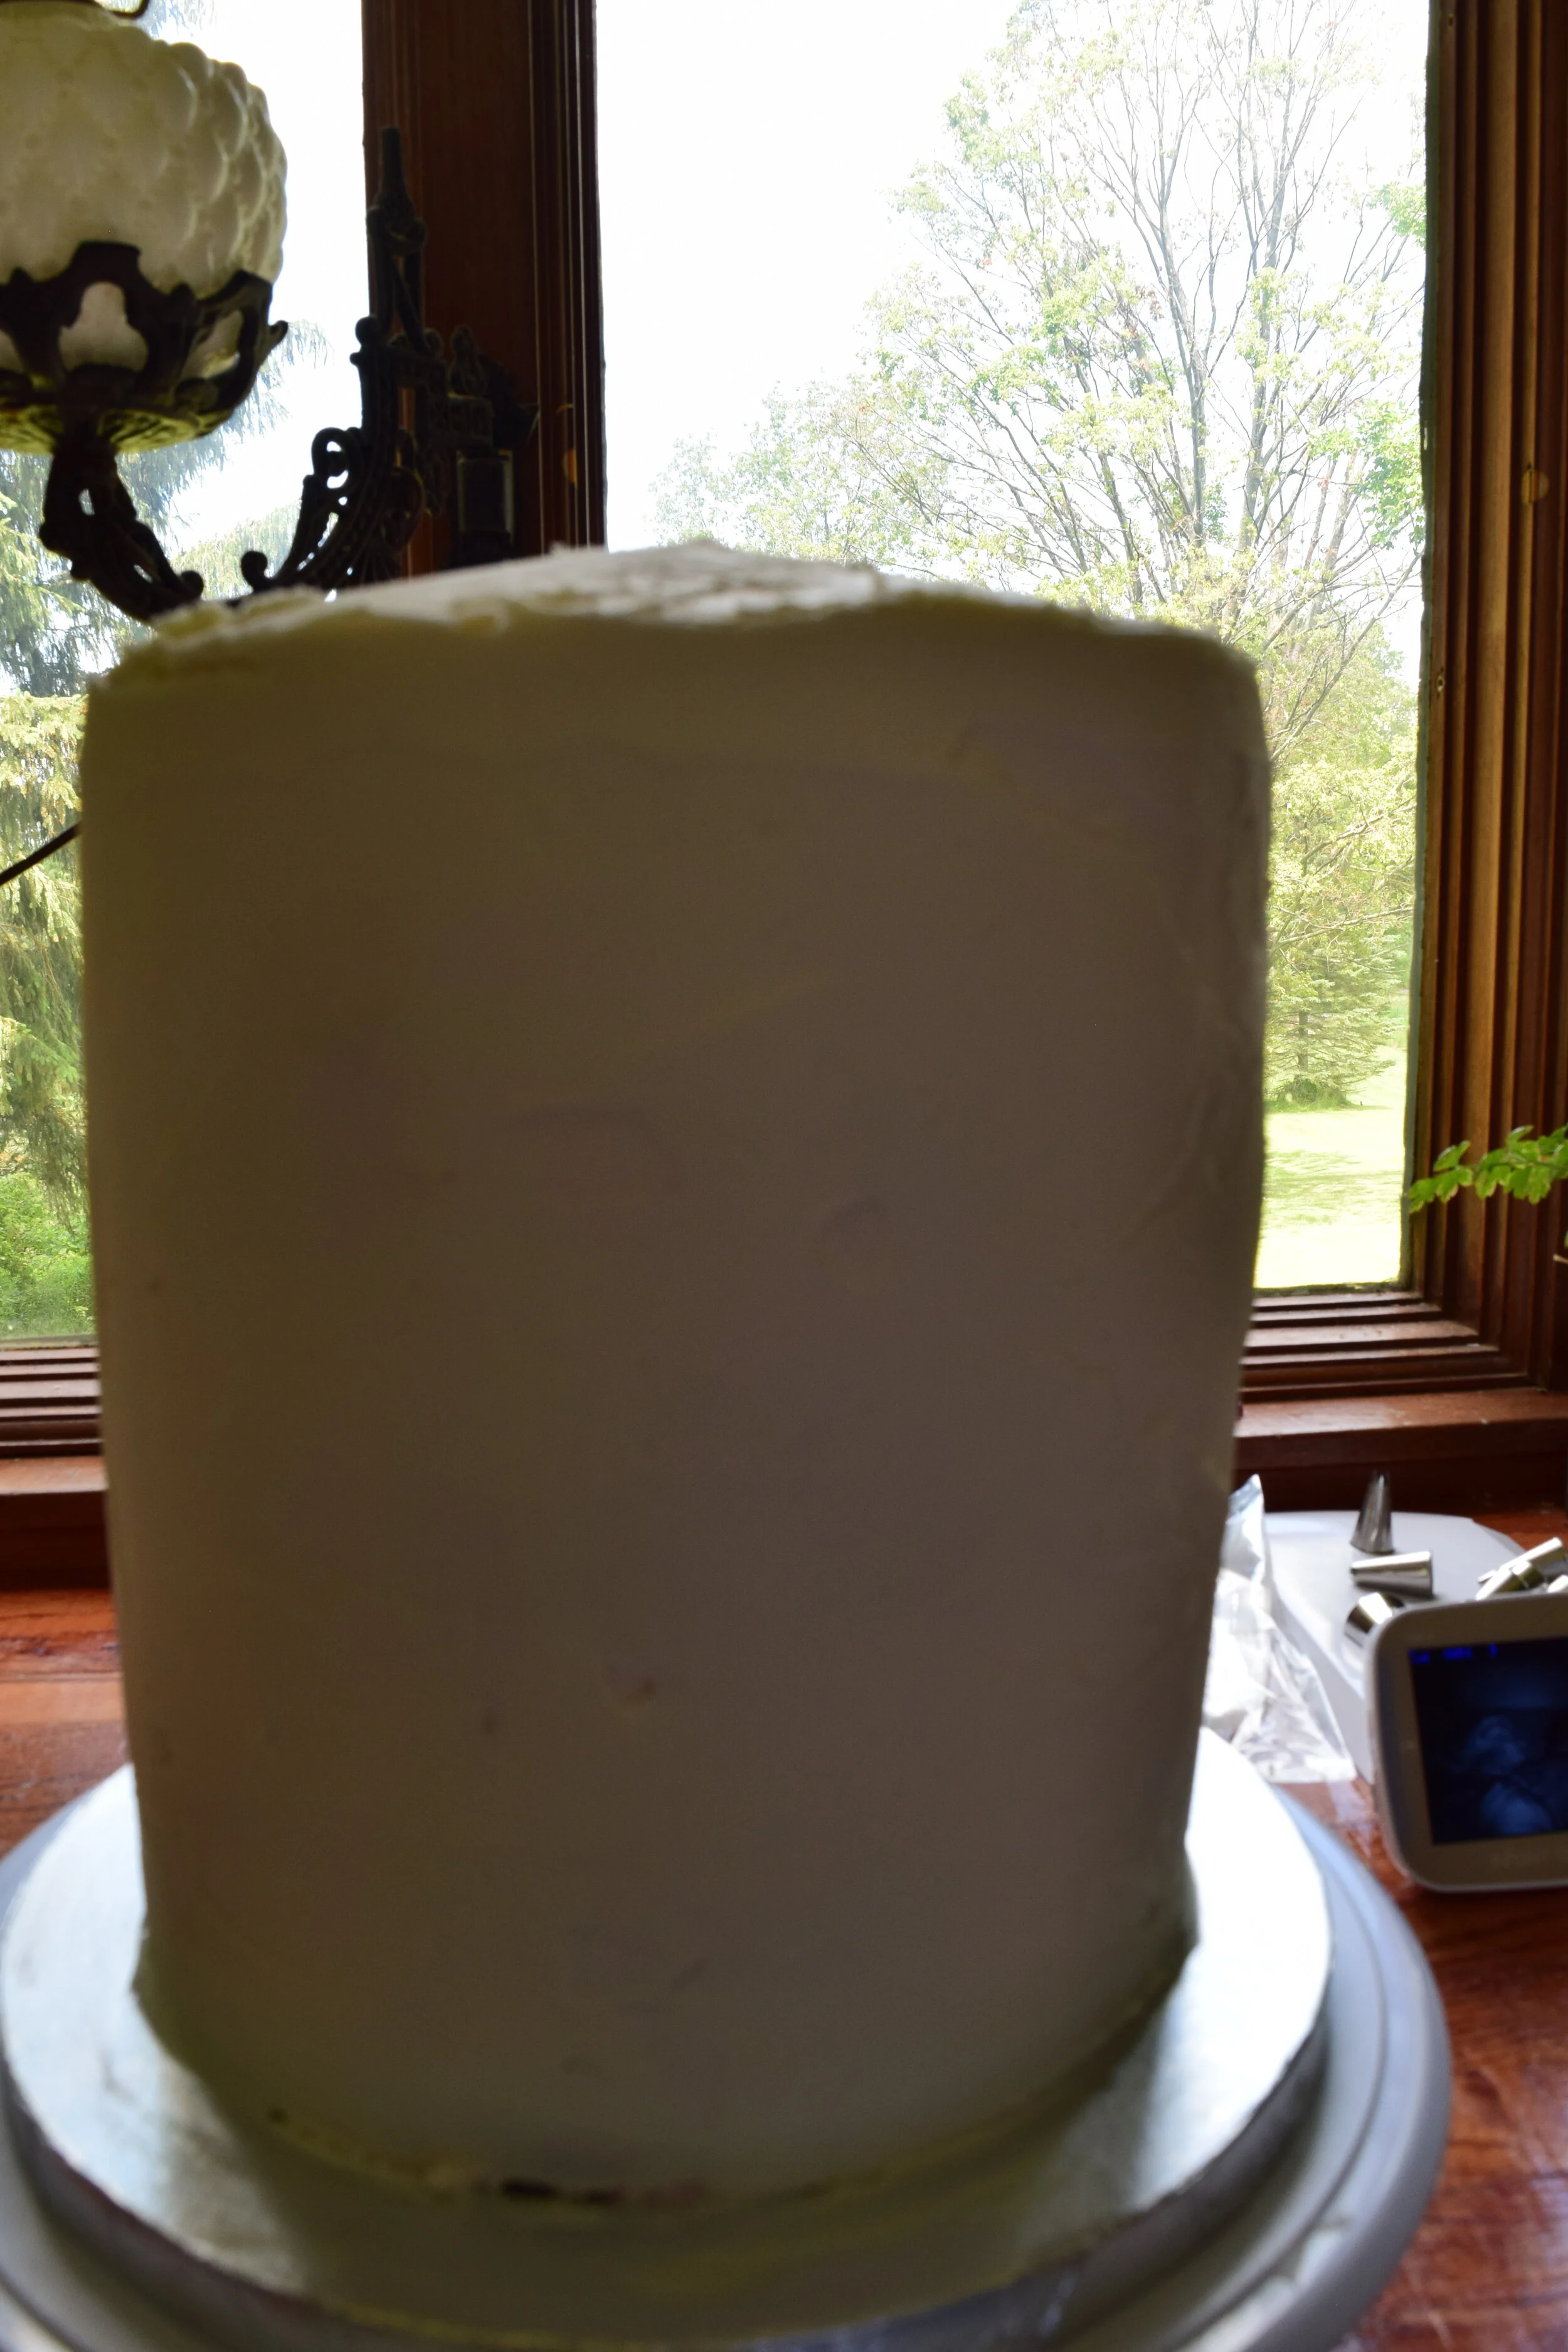
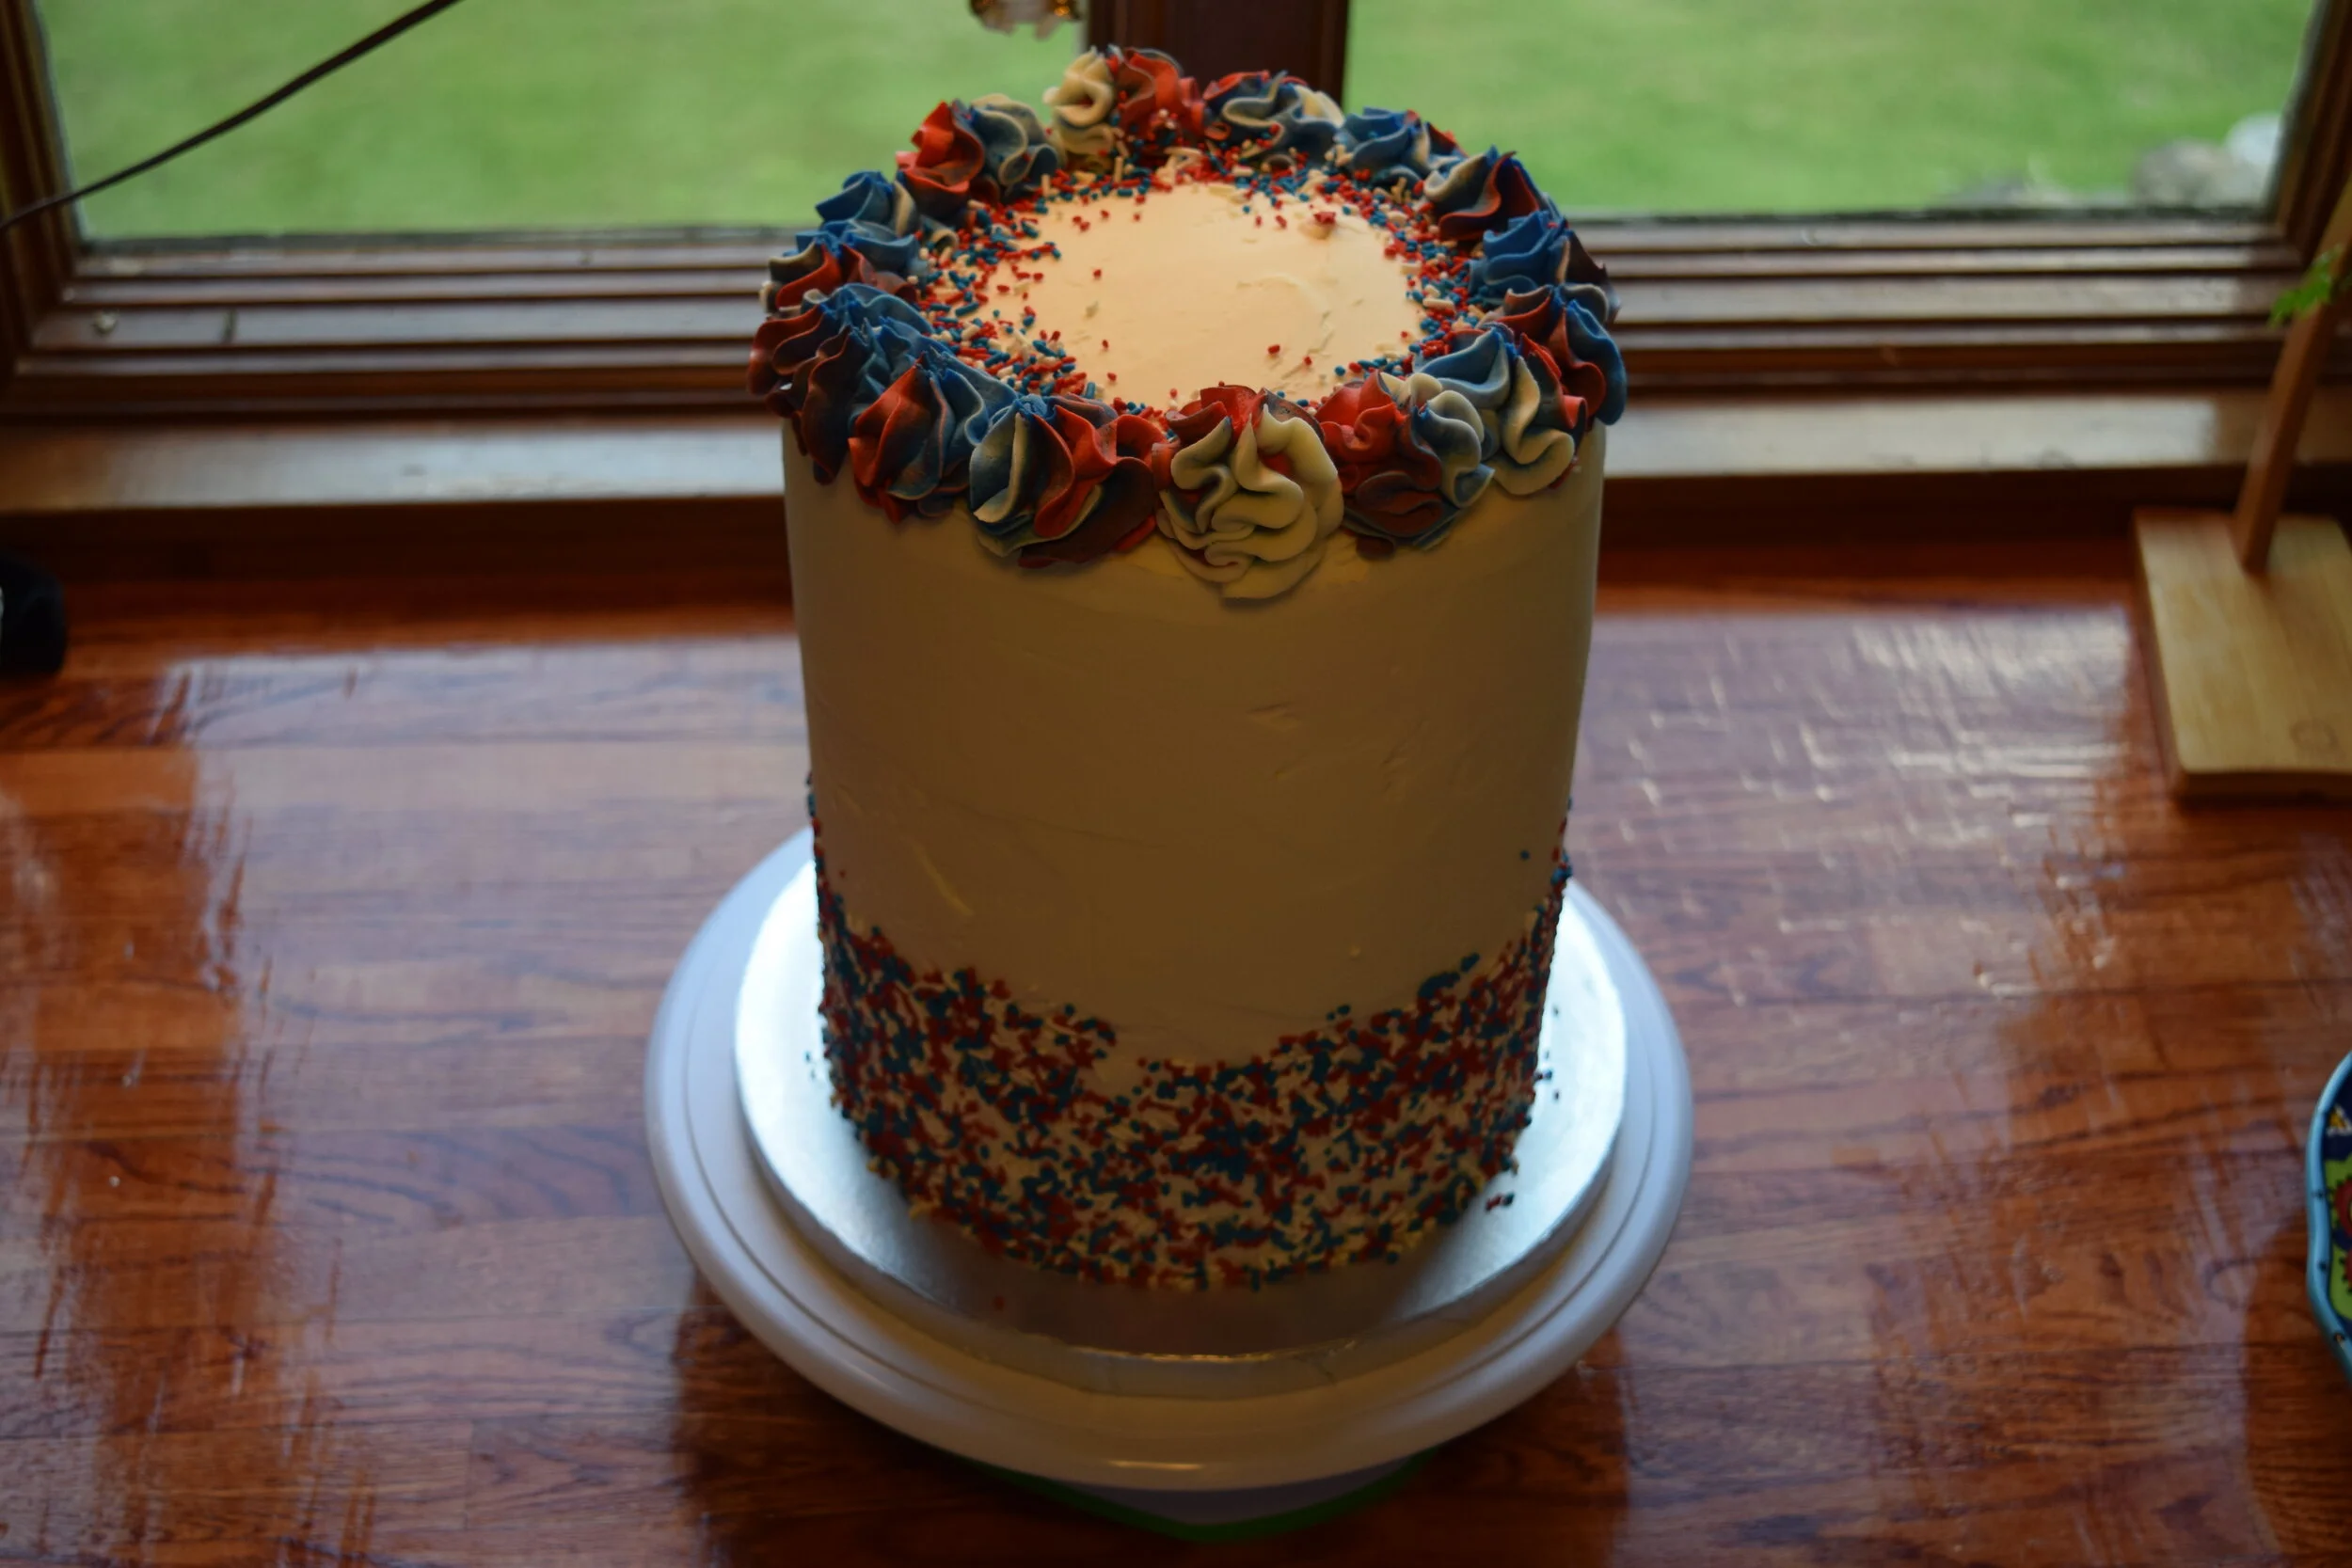
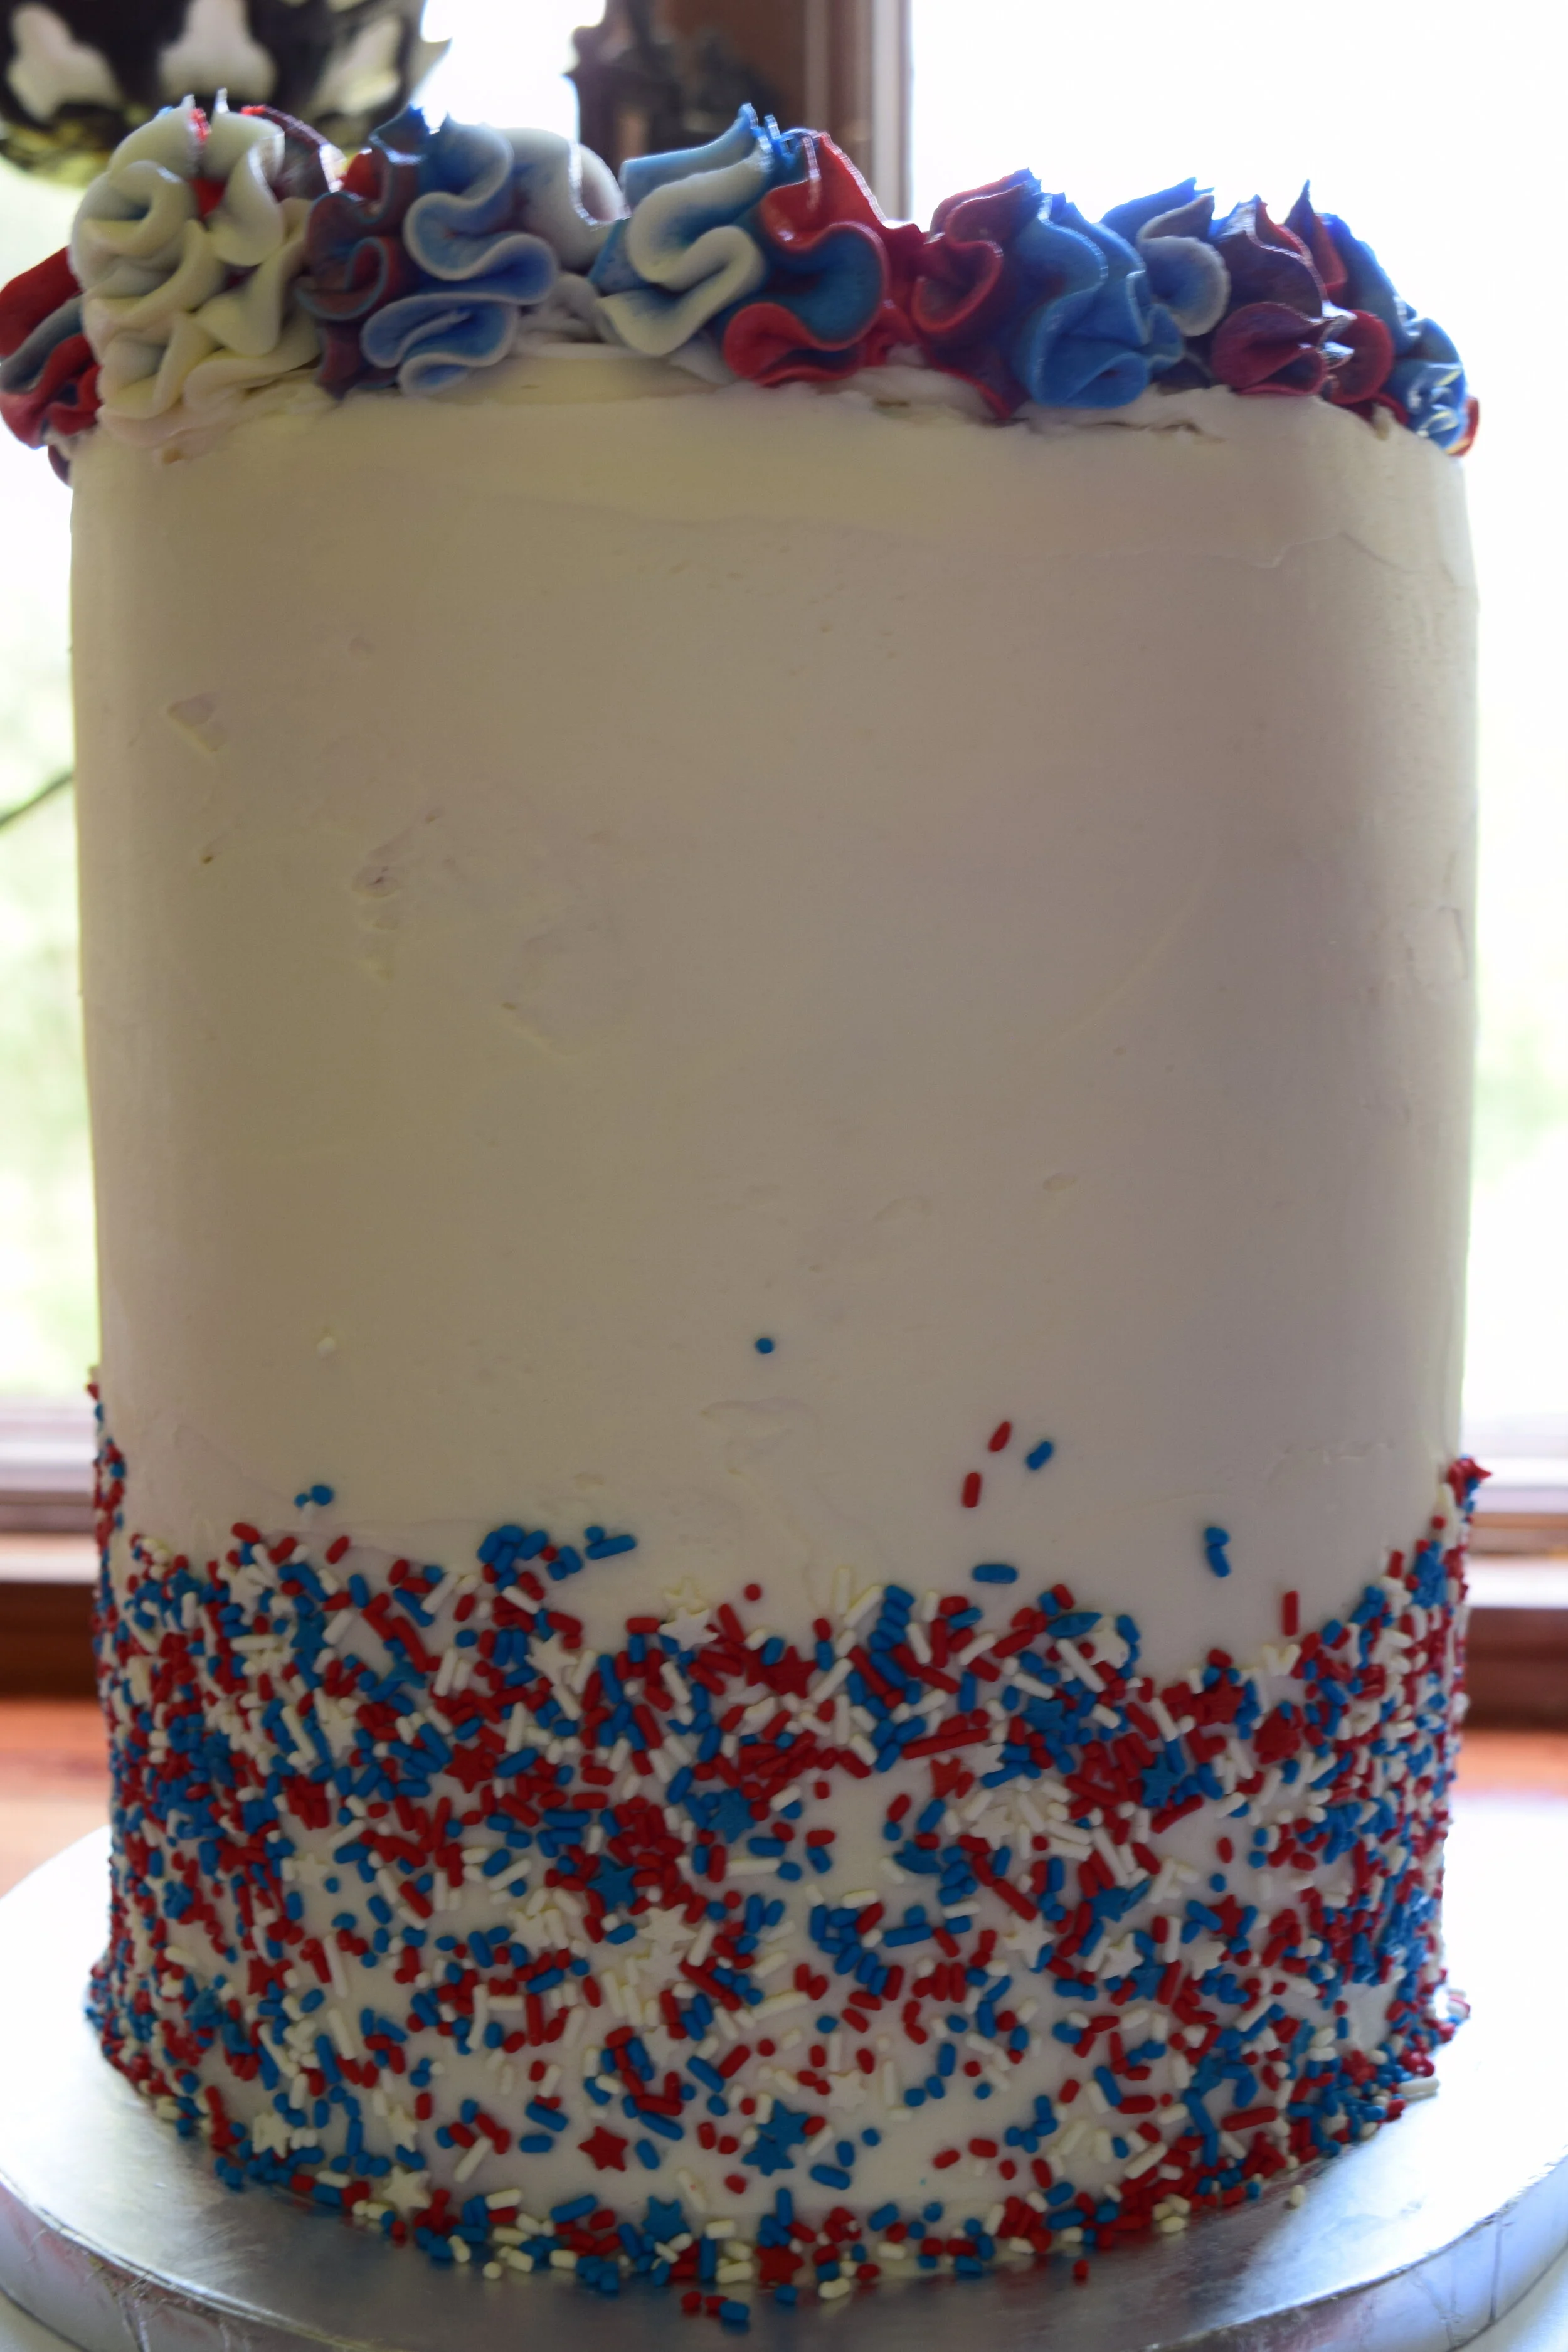
Next I took the cake out of the refrigerator and got ready for the magic to happen. I mixed the batch of white frosting that I have not touched yet by hand with a spatula to help make it fluffy again. Then I applied a layer of white frosting to the outside of the cake. Once I was satisfied with how smooth the last layer was I added red, white, and blue sprinkles to the bottom of the cake. I used simple sprinkles that I had laying around. After doing some research the past few days I think I’m going to venture into more exciting sprinkles, there so many options out there! Stay tuned for the next time I’m in the mood to bake cake ;)
Then I added the top frosting flares around the top of the cake edge and sprinkled sprinkles around the boarder. And just like that an American flag cake was born! I hope you will try making this cake it was truly easy and every one saw it was impressed!
American Flag Cake
Ingredients
Red soft gel food color
Blue soft gel food color
2 8 inch red velvet cake layers
1 4 inch red velvet cake layer
1 8 inch white cake layers
1 4 inch white cake layer
2 8 inch blue cake layers
2 batches of American buttercream frosting (check out my American buttercream recipe)
First batch left white
Second batch divided, 1 ½ cup blue, 2 cups red, the rest white
Red, white, and blue sprinkles
Directions
Bake and cool all cake layers
Cut 4 inch holes in both blue cake layers
Add white 4 inch to one of the blue layers
Add red 4 inch to the other blue cake layer
Place in freezer over night or at least for 4 hours.
Start with red velvet 8 inch layer on bottom
Spread red frosting on top
Then stack white 8 inch cake layer
Spread white frosting
Stack red velvet 8 inch layer
Spread red frosting
Stack blue layer with white inside
Spread white frosting over white inside and blue frosting over blue
Stack last blue and red layer
Place remaining red and blue frosting into decorating bag, along with some white
Add dools to cake
With remaining frosting crumb coat entire cake
Place cake in refrigerator for 10 minutes
Once frosting set use the first batch of all white frosting for final coat
Smooth with cake scraper
Add sprinkles to the bottom of the cake
Add frosting flares to top of the cake using the red, blue, and white decorating bag
Lastly add sprinkles to the boarder of flares
Enjoy!!